
This is a 3.5 minute YouTube video I filmed and edited on the technique I use for painting furniture to look old. It rips through the process pretty fast, but I think it shows everything that it needs to.
Take a look and let me know what you think, any feedback is appreciated.
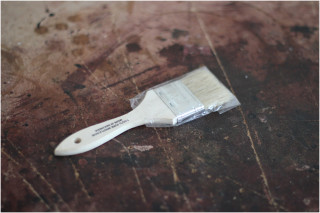
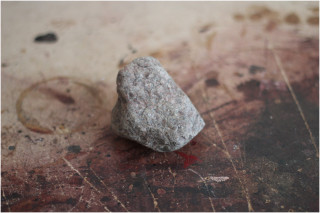
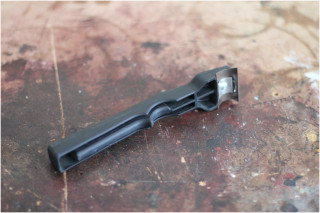
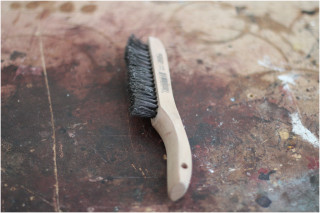
Tools you’ll need:
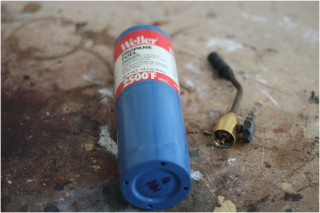
- propane torch
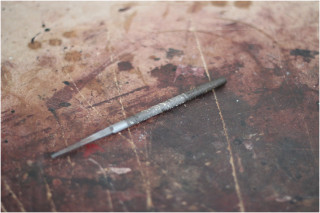
- rat-tail file
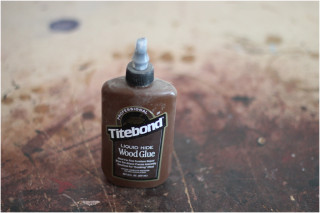
- liquid hide glue
- disposable brush
- softball size rock
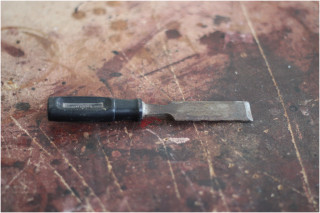
- old dull chisel
- paint scraper
- wire brush
Step # 1. Distressing
As furniture ages, the sharp details and edges are usually the first to wear. I start by softening all the sharp edges using a rat-tail file. Chip a corner or two using an old dull chisel. I like to add dents using a softball size rock. It’s important to rotate the rock as you strike the project because you do not want all the dents to have the same size and shape.
Next, alter the texture of the wood’s grain using heat and moisture. Doing this will rapidly change the cell structure of the wood, creating an aged look. Mist your project with water using a spray bottle. After the water has absorbed, quickly evaporate the moisture using heat generated by a propane torch. A little char is ok on the edges, but try not to burn your project too much.
Go over the whole project with the wire brush to remove any burs and excess char.
Step # 2. Apply penetrating stain
Oxidation causes wood to darken as it ages. To simulate this color change, I apply an Early American oil-based penetrating stain. Lambs wool pads works well for applying stain to larger projects; for small projects an old t-shirt or cotton rag works fine. Have a cheap brush handy for getting into tight spaces and into the details of moldings. After you have a section completely covered, wipe off the excess stain with a clean rag. Allow the stain adequate time to dry before begin the next step.
Step # 3. Wax the edges
Using a household tea candle or paraffin wax, wax the edges. This will make it easier to scrape down to the raw wood in step # 7.
Step # 4. Paint the base color
Brush flat latex paint on for the base coat. Choose a color that contrasts well with the top color. Let it fully dry.
Step # 5. Apply crackle coat
Before you brush on the crackle coat, give the base color of a light scuff sanding to smooth out the surface. In the video I used a store bought crackle coat, but normally I make my own using liquid hide glue thinned with a little warm water. Apply the crackle coat using a cheap disposable brush. It’s important to apply this layer in the same direction, otherwise when your top coat starts to crackle, it will look fake. Give the glue half an hour or so to dry.
Step # 6. Paint the top color
Make sure to use a flat latex paint, semi-gloss will not crackle. The paint will begin to crackle almost immediately. Work swiftly and do not brush over preceding strokes. Doing so will fill in the cracks. Allow the paint to dry overnight.
Step # 7. Distress the top color
Once the paint is completely dry, using a paint scraper and sandpaper, hit the edges to remove the paint covering the spots you had previously waxed. You can also sand through down into the previous layers on flat surfaces. Rub the spots you distress with a damp rag to give the distressing a more realistic worn look.
Step # 8. Apply the glaze (gel stain is the same thing)
Glazing altars the top color by darkening it, which creates an almost dirty look. Apply the glaze with a cheap brush. Work the glaze into the cracks and recesses to create an instant patina, and then wipe off the excess with a clean rag. This technique will add emphasis to your distress marks.
Step # 9. Brush or spray on shellac
Shellac seals in the preceding layers. I apply two coats of Zinsser blonde shellac, sanding between coats with #0000 steel wool.
Step # 10. Apply dark tinted wax.
After the final coat of shellac has fully dried, knock down the sheen by sanding with #0000 steel wool. Finally, apply a dark tinted paste wax using a clean rag.

Great video excellent music and a nice job on the distressing. I have always loved the “time lapse” type of videos and I have a ton of them to edit myself. Very nice
I found your video, very inspiring, extremely systematic, and I cannot wait to start distressing two old wardrobes we’ve just bought.
Thank you for taking the time to share your methods for antiquing furniture, with us.
This is so incredible!
Q: If you wanted the final coat to be white, would you skip the undercoat of paint?
@ Lisa
The under coat of paint is the color that shows through when the top coat crackles. If you want the final coat to be white, then use a different contrasting color as the under coat or skip that step and the crackle coat will expose the stained wood.
Loved the video! Excellent tutorial and although more involved than some of the others I’ve looked at I’ll bet your results outclass theirs. A side note–the beer is a nice touch, just what I like to do when I’m working at anything that’s on the physical side–gardening, painting, you name it.
This is fantastic. Very detailed and helpful for a newbie to refinishing like me. Added Bonus: “Wait So Long” by Trampled by Turtles is now a favorite on my iPod.
This is like the perfect blog post, from the video production, images and copy. Well done, great partnership with your photographer and thank you.
I loved this video! I’ve been looking for painting techs and this is the best by far! I just need to know the topcoat color you used, as this is the very look I want. Also thanks for the music! I just bought 3 CD’s of their’s. My son heard them and I had to get it for him too! More! More!
Hey that was a great video..Pinned it for later projects. But I have a question I have a Fake wood door and want to make it rustic.. black being the top coat and brown the bottom..Can I do it? And do I use stains like you did. Or any ideas, tips will be so grateful!!
This is an excellent technique! While there are many other’s that are simpler and quicker (candle wax etc.) you’ve really got it down and the look is quite authentic. This make take some time to do but the best things always do. After all, we are trying to create age and character in a very short time. Thanks for sharing this.
This is the best video ive seen ! luv it and it looks great at the end ! Really helped me out on trying to do my table thanks so much ! 🙂
What was the color of top coat you used for this video?
Thanks for this great video!! I have a stained piece that I want to refinish with the look being distressed white, how can I achieve this, could I eliminate the first steps, it’s already got some physical wear?
Thanks for an outstanding video! wow!